In search of new techniques
- Agnieszka
- May 2, 2021
- 3 min read
After a break from single focus on painting flowers it felt like I had to do a lot in a short period of time. My previous attempts to portray florals were quite time consuming. I was normally starting from painting midtones, darks, lights and then adjust all these areas with colourful pencils. My reference photos were quite detailed with a lot of various information, which in turn made me sink into them for ages with this technique. I was hoping that there was some easier way of approaching the topic which would speed up my process and still produce satisfying results.
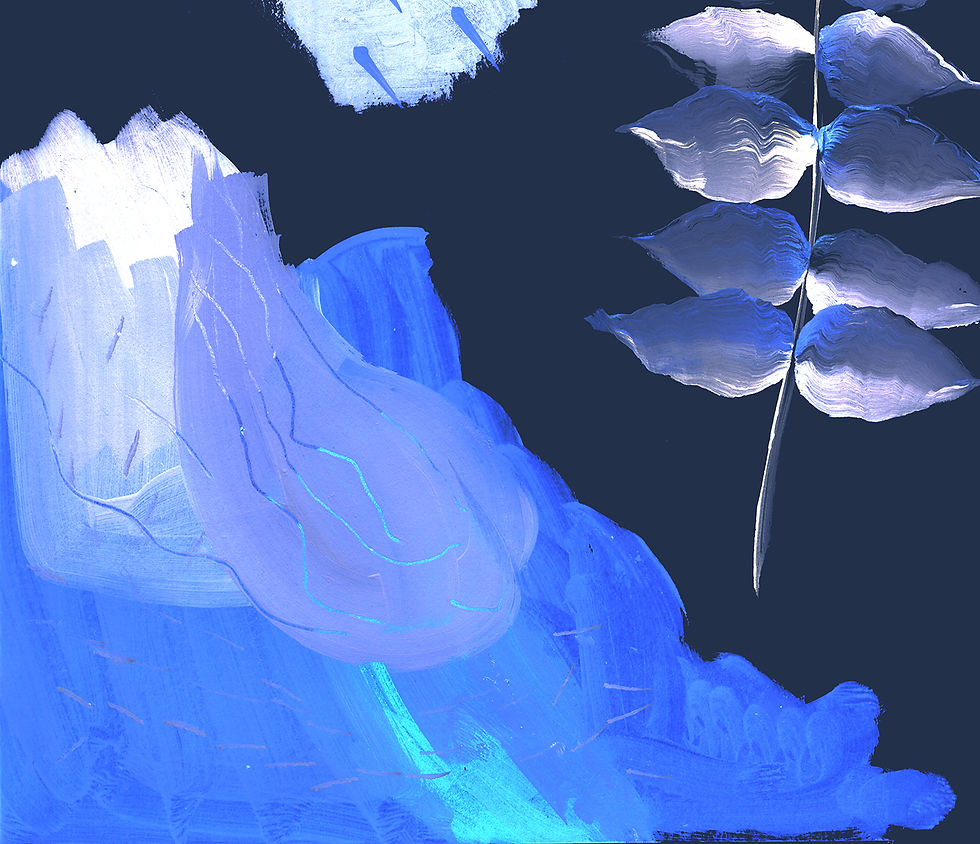
I started to paint elements which would create more of a background setting:

I first painted the smaller element, simplifying my object quite a lot and not trying to depict it exactly like in a reference photo. I didn't like the result much-found it generic and schematic. Therefore I again took my time to place all parts of the plant way more accurately. I then added more hues with pencils and lights with white compressed charcoral. I liked the effect, but it was too slow going, I thought.

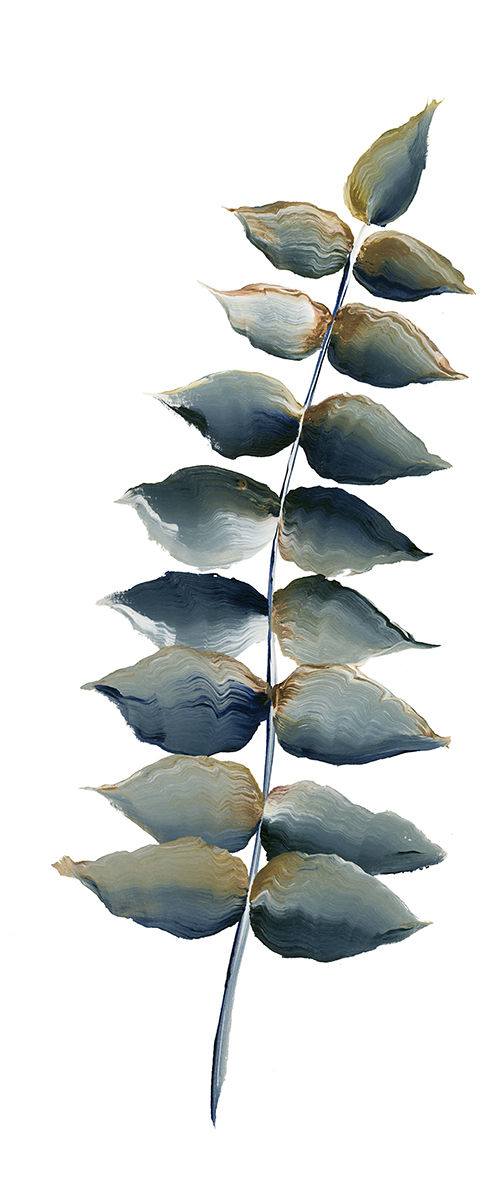
I attempted another one purely out of fun feeling it gave me in the process.
I now was ready to look for some new tips. In my search I found 2 ladies showing, new to me, ways of loading a brush when painting florals.
The first technique ( https://www.youtube.com/watch?v=cvV8MDxMrEk ) uses a flat brush which is loaded on each corner with a different colour/colours. When painting one twists the brush in various ways, producing different effects. It looked so easy and effortlessly when I was watching Amy paint the leaves, but to my surprise it was way more difficult for a first starter! I eventually got more understanding of how and when to twist a brush to get an effect I was after:

The one on the left was a second try, still very wonky, but on the third one I started feeling it more.
The hardest bit for me was to get leaves' ends pointy and more or less in the middle of them.
I was definitely progressing here and felt much more confident in navigating my brush. It also felt very satisfying seeing how the colours were blending on the leaves, giving a feel of ease and flow in mark making- the effect I definitely wanted to convey in my final pattern design.
Not pushing for perfection at this point, I moved to the next brush move to produce another kind of shapes:

This time again, I had to go through the wonky stage, and kind of accidentally painted leaves 'drifting in the air' next to the stem. I really liked them and could see the leaves floating in my pattern like a scent coming off of beautiful 'feminie' looking flowers(roses) and reaching more 'masculine' looking flowers(lilies).

This is third and the last technique using flat brush dipped in 3 colours at the same time. I was moving it along its thin edge, unlike in the previous two stroke kinds.
It was quick and easy- a nice addition to 'thoughtful' mark I used for flowers.


Here I was practising strokes and adding some random patches of paint which could be potentially used as textures in the pattern design.

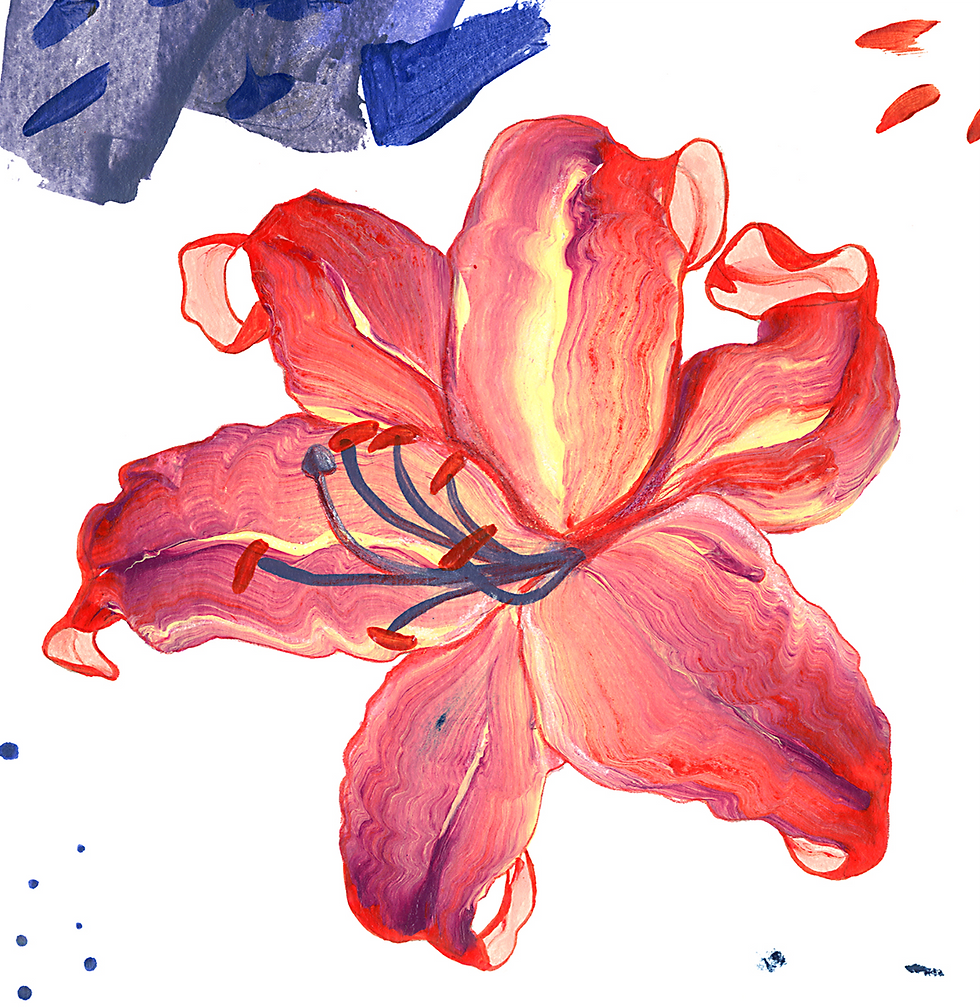
Then I moved on to try the other technique form Annet Lovart( https://www.youtube.com/watch?v=__rYb6O7MpY&t=350s ). She uses long round brushes for it. She also dips them in few colours at once: first colour covers almost whole brush and the additional ones cover less of it, with the last one sitting just on the tip. It also took me a few goes to figure out which colour combination feels best for me. I chose the one below. It didn't feel great, but was good enough- I like the shape and thought I can alter colours in Photoshop if I need to.
Ultimately, I was not sure about these results and decided to wait and see how they will play out in the main design.


Comentarios